
Batch-Prepping Baked Chicken Breasts So They Stay Juiciest
If you have ever opened a Thursday meal-prep container to find chicken breasts with the texture of a flip-flop, you are not alone. Learning how to batch bake chicken breast juicy is one of those skills that separates people who meal prep for a month from people who meal prep for years. The good news is that juicy baked chicken is not luck. It is a short list of repeatable steps — even thickness, a quick brine, the right oven temperature, and resting before you slice — that work every single Sunday.
This guide walks through the whole process the way I do it for a full week of lunches: what to buy, how to season a big tray without it tasting like cardboard, the exact temperatures that keep a dozen breasts moist, and how to store and reheat them so day five tastes nearly as good as day one. It works for any Canadian grocery budget, whether you grab value packs at No Frills or stock up at Costco Canada.
Key Takeaways
- Pound chicken breasts to an even 2 cm thickness so they cook at the same rate.
- A 30-minute salt-water brine is the single biggest upgrade for juicy baked chicken.
- Bake at 220°C (425°F) and pull breasts at 71°C (160°F) internal — carryover heat finishes the job.
- Rest 10 minutes before slicing, and slice only what you need per container.
- Stored properly, batch-baked breasts stay good for 4 days in the fridge and 3 months in the freezer.
Why Batch-Baked Chicken Breasts Go Dry
Chicken breast is lean, which means there is almost no fat to forgive your mistakes. The thick end of a breast can be twice as thick as the thin end. In a hot oven, the thin end hits well-done while the thick end is still catching up, so by the time the whole thing is safe to eat, most of it is overcooked. Moisture escapes as steam, the muscle fibres tighten, and you end up with that familiar chalky chew.
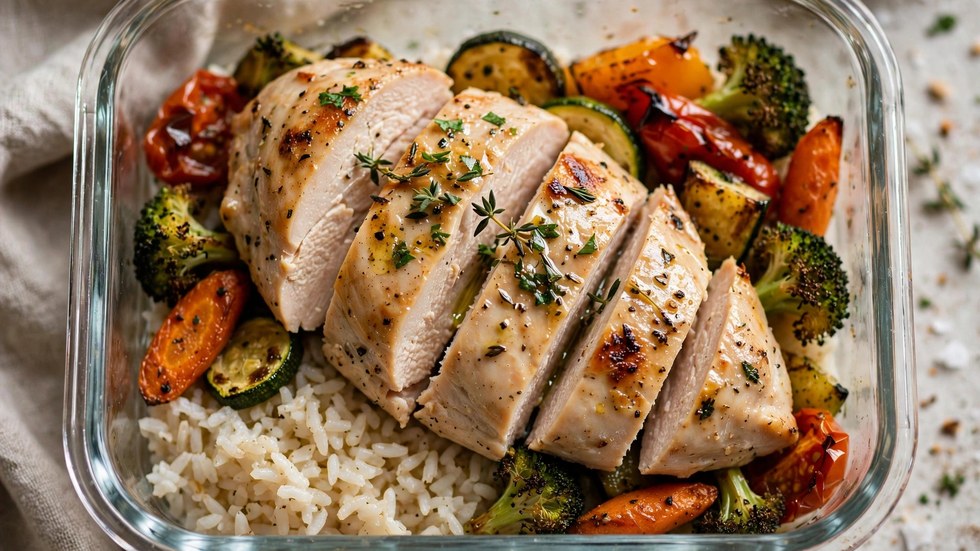
The second culprit is oven temperature. A lot of recipes tell you to bake low and slow, which sounds gentle but actually gives moisture more time to leave. A hot oven — 220°C (425°F) — sears the outside quickly and shortens the total cook time, so less juice is lost. It feels counterintuitive until you try it side by side: the hot-oven breast wins every time.
The third culprit happens after cooking. Slicing a breast the moment it leaves the oven lets the juices run straight onto the cutting board. Resting lets the fibres relax and reabsorb that moisture. Ten minutes of patience is the cheapest juiciness insurance there is.
How to Batch Bake Chicken Breast Juicy: The Foolproof Method
Here is the exact sequence I use when I am doing eight to twelve breasts at once. It takes about 15 minutes of hands-on time and roughly an hour start to finish, brine included.
Step 1: Pound to Even Thickness
Lay each breast between two sheets of plastic wrap or in a zip bag and pound the thick end down with a meat mallet, rolling pin, or the bottom of a heavy pan until the whole breast is about 2 cm thick. You do not need to flatten it into a schnitzel — just even it out. This one step fixes the uneven-cooking problem that causes most dryness, and it takes about a minute per breast. Trim any ragged bits of fat or tendon while you are at it, since they cook up chewy.
Step 2: Brine for 30 Minutes
Dissolve 60 ml (1/4 cup) of kosher salt in 1 litre (4 cups) of cold water in a large bowl. Submerge the pounded breasts and refrigerate for 30 minutes — no longer than an hour for breasts, or the texture turns spongy. Brining works through simple osmosis: the salt water seasons the meat from the inside and helps the proteins hold onto moisture during cooking. If you only adopt one habit from this article, make it this one. Rinse the breasts briefly under cold water after brining and pat them completely dry with paper towel. A dry surface is what lets the seasoning stick and the exterior brown properly.
Step 3: Oil and Season Generously
Rub each breast with about a teaspoon of olive oil or avocado oil, then season more aggressively than feels reasonable. A big tray of plain chicken needs real seasoning. My go-to batch blend per 8 breasts: 2 tablespoons smoked paprika, 1 tablespoon garlic powder, 1 tablespoon onion powder, 2 teaspoons dried oregano, 2 teaspoons black pepper, and 1 teaspoon salt (go easy here since the brine already salted the meat). Press the seasoning on so it adheres. If you like variety across the week, divide the tray in half and do two different blends — more on that below.
Step 4: Bake Hot and Fast
Arrange the breasts on a parchment-lined rimmed baking sheet with a little space between them — crowding steams them instead of roasting them. Bake at 220°C (425°F). Timing depends on thickness, which is why the pounding step matters so much:
| Breast thickness after pounding | Oven temperature | Approximate bake time | Pull temperature (internal) |
|---|---|---|---|
| 1.5 cm | 220°C (425°F) | 14–16 minutes | 71°C (160°F) |
| 2 cm | 220°C (425°F) | 18–22 minutes | 71°C (160°F) |
| 2.5 cm | 220°C (425°F) | 22–26 minutes | 71°C (160°F) |
| 3 cm (unpounded) | 200°C (400°F) | 26–30 minutes | 71°C (160°F) |
Use an instant-read thermometer and pull the breasts at 71°C (160°F) in the thickest part. Carryover cooking will bring them to the safe 74°C (165°F) while they rest. This is the detail most home cooks miss: if you wait until the thermometer reads 165 in the oven, the chicken is already overdone. A $15 thermometer from Canadian Tire pays for itself the first Sunday you use it.
Step 5: Rest, Then Portion
Transfer the breasts to a cutting board and rest them for 10 minutes, tented loosely with foil. Do not slice into them to “check” — that is what the thermometer was for. After resting, slice against the grain into strips or cubes, and portion into your containers. Slicing against the grain shortens the muscle fibres and makes each bite noticeably more tender, which matters a lot by day three or four.
Batch Seasoning Blends That Survive Four Days
One tray, one seasoning is the fastest route to flavour fatigue. Splitting a batch across two or three blends takes two extra minutes and makes the week dramatically more interesting. Keep the salt level consistent across blends since the brine already handled the baseline.
- Smoky Southwest: smoked paprika, cumin, garlic powder, onion powder, oregano, and a pinch of cayenne. Pairs with rice, black beans, and corn.
- Lemon Herb: dried oregano, thyme, garlic powder, lemon zest, and black pepper. Built for grain bowls and Greek-style wraps.
- Maple Mustard: whisk 2 tablespoons each of grainy mustard and pure maple syrup with a teaspoon of oil, and brush it on during the last 5 minutes of baking. Sweet, tangy, and very Canadian.
- Simple Salt and Pepper Plus: coarse salt, cracked pepper, garlic powder. The neutral batch you can throw into anything — fried rice, pasta, quesadillas.
A quick note on sugary glazes like the maple mustard: add them near the end of baking, not at the start, or the sugars burn before the chicken is done.
Storing a Week of Chicken Breasts
Cool the portioned chicken at room temperature for no more than an hour, then refrigerate in airtight containers. Glass containers with locking lids are worth the investment — they do not stain, they reheat evenly, and you can see what is inside. Properly stored, cooked chicken breasts keep for 4 days in the fridge. If you prepped on Sunday, plan to eat the last of them by Thursday dinner.
For longer storage, freeze portions flat in zip-top bags with the air pressed out. They keep well for up to 3 months. Thaw overnight in the fridge, never on the counter. One practical trick: freeze a spoonful of chicken broth in each bag. It melts into the meat during reheating and adds back a little moisture.
Reheating Without Ruining Them
The microwave is the usual suspect in day-three dryness, but it is fine if you are gentle. Sprinkle a teaspoon of water or broth over the sliced chicken, cover the container loosely, and heat at 50–70% power in 60-second bursts until just warm. High power blasts the remaining moisture out. If you have a few extra minutes, a covered skillet over medium-low heat with a splash of broth gives the best texture of all — about 3 minutes, turning once.
What Batch-Baked Chicken Costs in Canada
Chicken breast is one of the most economical high-protein foods in the country. A value pack of boneless, skinless breasts at No Frills or Real Canadian Superstore typically runs about $5–$7 per pound on sale, and Costco Canada’s bulk packs often come in lower per kilo. At roughly those prices, a 170 g cooked portion — about 50 g of protein — costs in the neighbourhood of $1.75–$2.50 CAD in raw chicken, plus pennies for seasoning and parchment.
Compare that to a $6 rotisserie chicken’s worth of breast meat or a $12 fast-food grilled chicken bowl, and the Sunday bake pays for itself by Tuesday. The calculator below lets you plug in your own local prices to see your exact cost per portion.
Canadian Meal Prep & Macro Estimator
Enter your costs in $ CAD and get per-portion cost, macros and freezer guidance.
Mistakes That Dry Out Batch Chicken
- Skipping the thermometer. Guessing doneness by time alone is how breasts end up at 180°F and sawdusty. Pull at 160°F and let carryover heat finish.
- Over-brining. More than an hour in salt water makes the texture mushy rather than juicy. Set a timer.
- Crowding the pan. Breasts touching each other steam instead of roast. Use two sheet pans if you have to.
- Slicing too early. Cutting into a just-baked breast spills the juices you worked to keep. Rest 10 minutes, every time.
- Reheating on high. Full-power microwaving is a second round of overcooking. Low power, covered, with a splash of liquid.
Master these five habits and your batch-baked chicken breasts will stay juicy from Sunday’s bake through Thursday’s lunch. It is a small skill with an outsized payoff: once chicken stops being a chore to chew, the rest of your high-protein meal prep gets a whole lot easier.


You May Also Like
High-Protein Shepherds Pie Prep with Cauliflower & Potato Mash
30g+ Protein Lunch Bowls Under $4 CAD: Step-by-Step Prep